Category

Tech

pharmacokinetic services
in Tech

5 Differences Between Pharmacokinetics And Pharmacodynamics

Pharmacology is the study of drug and human interaction. Within pharmacology sciences, pharmacokinetics and pharmacodynamics are two broad divisions crucial for pharmaceutical analysis. Pharmacokinetics studies (PK) and pharmacodynamics (PD) determine the drug safety and efficacy profiles by measuring and describing the complex interactions between the body and a pharmaceutical drug product.

Regulatory agencies are responsible for the approval or denial of new drugs to a potential market. They are also responsible for ensuring the safety and efficacy of all drug products. However, understanding these efficacy and safety profiles partly depends on PK and PD analysis. Although PK/PD analysis provides crucial drug safety and efficacy data, there are certain fundamental differences between them. Following are the five primary differences between PK and PD analysis. Moreover, the current article also provides specific PK/PD applications for CROs and pharmacokinetic services.

Five key differences between pharmacokinetics and pharmacodynamics (PK vs. PD)

  1. PK studies the drug movement through the body. On the other hand, PD is the body’s natural response to a drug product.
  2. PK assays study the effect of an organism on a specific drug product, while PD evaluates the impact of a drug product on the target organism.
  3. PK models are based on characterizing the bioavailability and absorption, distribution, metabolism, and excretion properties of a drug product, whereas PD assays are assessed in terms of molecular or biological interactions.
  4. PK assays provide crucial information about the course of time of drug concentration and the effects these drug concentrations may have on the organism. PD assays contribute to understanding drug intensity with respect to drug concentration in the body.
  5. Finally, the analysis-dose response curve for pharmacokinetic assays is drug concentration vs. time. Contrarily, drug effect vs. time is the analysis-dose response curve for pharmacodynamic assays.

PK/PD analysis

PK/PD analysis is crucial for drug development. They help us understand drug movement through the body and how an organism reacts to the drug product. Researchers use these insights to design more robust clinical trials such as dosage forms or drug reactions. Besides, clinicians use PK/PD data on the drug label to better treat different patient types. For example, the elder vs. younger population and patients with and without liver diseases. Moreover, PK/PD analysis can help determine several parameters related to drug development. These parameters include:

  • Determine drug exposure
  • Characterize appropriate dose levels for a clinical trial
  • Modify appropriate changes in drug doses
  • Identify the rate of absorption and elimination
  • Quantify bioavailability and bioequivalence
  • Understand inter and intra-patient variability
  • Determine safety margins.

Drug developers can integrate PK/PD profiles with preliminary data and evaluate the probabilistic risk profiles of potential drug candidates. These discernments can help eliminate drug candidates possessing a higher risk of failure in subsequent clinical trials.

In conclusion, PK and PD are crucial components of a drug discovery and development project, as they help assess the safety and efficacy profiles of drug candidates. Although PK and PD are used in tandem in a pharmaceutical setting, they have some fundamental differences, and understanding these differences can be the key to a robust drug development project.

WhatsApp Chatbot Integration
in Tech

WhatsApp Chatbot Integration – A Complete Guide

In the past few years, a WhatsApp chatbot has advanced significantly by improving customer interactions and offering exceptional service. As a result, many businesses are creating their own WhatsApp chatbot to offer customers a customised experience with a human touch.

WhatsApp is the most incredible app for sending private messages, transactional updates, OTPs, and follow-ups. A WhatsApp chatbot integration addresses and resolves customer queries in the shortest time possible to support business growth.

With its rich communication, it helps in providing customer retention while building brand awareness and loyalty. The article will discuss the importance of WhatsApp chatbot integration along with a step-by-step tutorial for integrating them.

Why WhatsApp Chatbot?

WhatsApp has become the industry leader in communicating on a global scale. It first aided people in maintaining relationships with friends and family. But with time, it developed into a reliable foundation for a company’s operations.

It can be accessed without requiring a high level of technological expertise. Furthermore, end-to-end encryption, which prevents even WhatsApp from viewing the discussion between the sender and recipient, is the most secure messaging platform. Your customers won’t have to wait for several hours to receive responses to their questions as a result.

Your business will be more active and effective with the WhatsApp chatbot, and you can build a strong brand for it. Lastly, its media-rich features personalise the dialogue and let marketers share pertinent images, videos, gifs, voice memos, and documents.

Step-By-Step Guide to WhatsApp Chatbot Integration

You can build your own WhatsApp chatbot with the help of the various communication service providers available in just a few simple steps. Then, you can begin communicating with your customers. Let’s look at the steps below on how you can perform WhatsApp chatbot integration:

Register For The Whatsapp Business API

The first step is to register for the WhatsApp chatbot integration by adding an email, full name, legal company name and optional business description. Here you need to wait for the approval, which will take around 15-20 days.

Create The Chat Flow By Considering The Dialogue And Conversation

Once approved, you must update the commonly asked questions and the answers you want your chatbot to provide. Giving your chatbot enough references will enable it to interpret questions and commands and respond to them accurately.

Test Your WhatsApp Chatbot

It’s crucial to test a chatbot after it has been built. Here, we want to see if the chatbot provides accurate and pertinent responses to a fictitious user’s queries. You can use it to help you modify your chatbot in response to comments you receive after releasing it.

Discover & Experience Customer Engagement Like Never Before!

With a WhatsApp chatbot integration, you can make your business available to potential customers over multiple channels where they are most active. Further, the WhatsApp chatbot ensures the discussion by enhancing the development of client relationships and creating a favourable first impression on potential customers. In addition, automating routine contacts lowers acquisition and retention costs while improving the client experience.

Mtalkz is the top provider of communication services that businesses can utilise to increase customer satisfaction by providing quicker, more accurate, and more dependable answers to client queries. This enables businesses to gain the confidence of their customers and boost their credibility. Contact Mtalkz right away!


in Business, Tech

Old School SPOT TRADING

What is old-school spot trading?

Spot trading is a type of trading that involves the immediate exchange of currencies between two parties. The name “spot” refers to the fact that trades are executed “on the spot”—that is, immediately. Spot trading is the most common type of currency trading, and it’s what most people think of when they think of “forex trading.”

Spot trading can be done in two ways: through a broker or through a direct dealer. When you trade through a broker, you’re essentially betting that the broker will be able to find someone on the other side of the trade who is willing to take the other side of your transaction. When you trade directly with a dealer, you’re matching up your trade with another trader who has already been matched up with someone on the other side.

The benefits of old-school spot trading

There are many benefits to old-school spot trading. One benefit is that it can help you make money. Another benefit is that it can help you learn about the market and how to trade. Finally, spot trading can also help you build relationships with other traders. The only problem with spot trading is that it can be very risky. When you trade on the spot market, you are taking on all of the risks yourself. If you were too short a stock and it happened to go up, you would lose money right away.

The drawbacks of old-school spot trading

Spot trading is the traditional way that investors buy and sell stocks. It involves finding a stock that you want to buy or sell and then contacting a broker to execute the trade. Spot trading has several drawbacks.

First, it can be very time-consuming. You must research each stock before you trade it, and then keep track of the stock price in order to know when to buy or sell it. This takes up a lot of time that could be better spent on other things.

Second, spot trading is often very expensive. Brokers charge fees for every trade, and these fees can add up quickly. If you’re not careful, you could end up paying more in fees than you make in profits.

Third, spot trading is risky. Since you’re buying and selling stocks directly, you’re exposed to the full risk of the market.

Who is old-school spot trading for?

Spot trading is a type of trading that involves the immediate purchase and sale of assets, typically without using any leverage. This contrasts with other types of trading, such as futures or options, which involve contracts that may not be immediately executed.

Old-school spot trading is for investors who want to take a more hands-on approach to their investments. This type of trading requires knowledge and understanding of the underlying asset as well as the market conditions that may impact its price.

Spot traders typically look for opportunities to buy an asset when it is undervalued and sell it when it is overvalued. In order to be successful, they need to have a good understanding of both the asset and the market conditions.

While old-school spot trading may not be for everyone, it can be a lucrative way to trade if you have the knowledge and experience.

How to get started with old-school spot trading.

Spot trading is a type of trading that allows investors to buy and sell cryptocurrencies without having to worry about the underlying technology. This means that spot trading is simple and straightforward and can be done by anyone with a basic understanding of how markets work.

If you’re interested in old-school spot trading, there are a few things you need to know before getting started. First, you’ll need to find a reputable exchange that offers spot trading. Next, you’ll need to create an account and deposit some funds. Finally, you’ll need to familiarize yourself with the order types and market conditions.

Once you’ve done all of this, you’re ready to start old-school spot trading! To do this, simply place an order using the exchange’s order book or trade interface. If your order is filled, you’ve successfully traded!

Conclusion

In conclusion, old-school spot trading is a great way to make money in the markets. While it may not be as exciting as some of the newer methods, it is a proven and effective way to trade. If you are looking for a simple and effective way to trade, then old-school spot trading is the way to go.

in Tech

Your Favorite Social Media Platforms’ Web 3 Alternatives

Discussion to follow on decentralized social media

We’ve heard enough about how Web 3 will shape the creative economy, so let’s move on. Numerous blogs discuss the Web 2 giants and how to produce content for them.

The world is transitioning to an ownership economy, and soon the centralized platforms we currently use will be replaced by decentralized ones that are advantageous to creators.

We’re going to speak about several Web 3 substitutes for the most widely used social media sites today.

  1. Odysee

Odysee, a Web 3 version of YouTube, debuted in December 2020.

Because of free expression, it has been able to grow its user base in just a few short years.

The LBRY network is home to video material hosted on the platform.

The creator’s channels cannot be erased because the content is preserved on the blockchain. There are no moderators, and community members handle administration. Tokens are given to everyone who uses the platform to build and views the video.

The absence of censorship and advertisements is the best feature.

  1. Supernovas

Supernovas, the Instagram of NFTs, is the platform used by Web 3 natives who are deeply involved in the NFT community.

The DeSo blockchain, renowned for its open-source social media infrastructure, serves as the foundation for the platform.

The Supernovas platform is a great place for NFT artists and collectors to interact and create a community of art enthusiasts.

  1. Reverse

A blogging site called Mirror.xyz was introduced as a decentralized alternative to Medium. To participate in the DAO and make contributions to the protocol, writers needed $WRITE tokens.

The community could vote on the projects and contributors they wanted to read, thanks to a voting system that was in place.

Then, authors were permitted to use NFTs to crowdfund their initiatives.

  1. Diamond

Diamond is a significant one from the DeSo blockchain and a decentralized alternative to Twitter.

It is also an improved version of BitClout, which gained notoriety for using celebrity names to steal and then sell their tokens.

On the other hand, Diamond lets users buy and trade the tokens of their preferred influencers on the network.

Readers have the option to commend platform users’ tweets. The software also enables currency launches by creators.

  1. Entre

Web 3 has revolutionized both social networks and professions. The web3 social media website development professional network, according to Entre.

It is very beneficial for professionals looking to network, employ, or raise money because it allows you to make money while utilizing the site.

Fortunately, it’s protected from the Linkedin hordes and will probably remain that way as long as it’s still quite young.

It is more entertaining than LinkedIn, thanks to the gamification and reward systems, which designers can use to their benefit.

Lastly

Numerous new social networks are entering the market.

Anyone wishing to innovate in this space has access to the infrastructure thanks to open-source and blockchain technology through protocols like Lens and DeSo.

Digital Marketing
in Tech

How to Take Advantage from Online Marketing?

What they neglect to understand is that they do not have a strong presence on the web, thus attracting the attention of more potential customers who can help their business develop further. Because they neglect to draw, they are missing out on such a ton.

It’s no surprise that neighborhood HR support entrepreneurs stick with traditional methods. Because it somehow works for them. That said, the inconvenience of such methodologies is that they can start more businesses and increase their business development and performance. In today’s market, not building an online presence is, of course, viewed as a huge mistake in light of the fact that the market is effectively moving and leaning more towards the individual who is the Internet his client.

A significant number of Australia’s experienced and talented organizations will probably never be fully involved in internet promotion, but with the current market patterns and set-ups it is unquestionable to have a strong online presence. One such high degree of publicity and recent proficiency is online marketing showcases. Many Australians use informal means of communication such as Facebook, Twitter and Instagram. It’s not news that we’re pouring energy into Individuals who do not have a dynamic presence on the web.

Online media can become an important device for connecting new customers and driving transactions. If you want your neighborhood business to reach more prospective clients, or if you want to become more known locally, at that point a dynamic online media presence is absolutely essential. Media locales are a special way to refresh your clients on the latest advancements in your business, including product delivery, deals and promotions.

Posting quality, attractive photos on the web-based media mentioned above is equally helpful as it attracts more customers. These locales are also advantageous when building image and image by sharing the position of your business relative to its current operations. is also helpful. If his web-based media profile for your business is dynamic, it will definitely show up on the top program results pages, making your business more visible on the web.

If you struggle with using web-based media to set up an online presence for your HR benefits business, you should consult a computerized advertising organization. It’s even more stipulated to have an expert move the feed while it’s out. Information and infrastructure for advanced advertising features are limited, and doing missions alone can have meaningless results and can drain your time, money, and energy.

Generating and sustaining a successful web-based media promotion effort requires the guidance of experts in the field of web-based advertising. The ability of these web-based shopping and online organization specialists to attract prospects, support your business and drive more profit in the cycle, as advanced showcase standards and patterns all work together. You can definitely get it.

There are many advanced promotion organizations in the country, so it is necessary to choose a company with a lot of business experience. Look for the most easily available advanced advertising organization in your business with a perfect record and see the results.

Web-based media can be an important factor if you want your local business to run smoothly on the web. Note that computerized showcases are good for your business as they help you connect more customers and facilitate your organization’s transactions in an effective and rational way.

Related posts
in Tech
Top Digital Marketing Skills To List on Your Resume
April 8, 2024
in Tech
Google Analytics: 12 Tips for Digital Marketing Agencies
March 4, 2023
in Business
4 Reasons Behind Students Leaning More Towards Seeking Help From Online Marketing Management Assignment Help Sites
October 1, 2022
promo-image
in Tech

Social Media Marketing: A Beginner’s Guide

Social media marketing is the process of increasing website traffic and visibility by using social media platforms. For people to share content that interests them with others starts a vicious cycle that would cause a business to cover and go beyond the market audience intended. Usually, creative content to reach the masses through publicity from a third-party trusted source needs to be created during this process.

Every internet marketer must have a purpose, a thing to sell, something to offer as a service, and something to advocate for on the enormous and overwhelming World Wide Web. Congratulations if you already know what those items are in your head. The most problematic aspect of joining the social media challenge may have been that, from then on, all your efforts will be directed at achieving those objectives effectively and perfectly until you reach the rank of Best SMM panel.

The world of social media is bigger and more diverse than ever. It is a brilliant marketing platform connecting people of all ages, genders, religions, places, and interests, making it the ideal tool for reaching and targeting the correct audience and achieving success. For instance, only those that include video games in their interests will be interested in them.

The rest of the world won’t care. If you advertise high heels for sale to a male audience, some of them may buy a pair or two for their wives, but this is not the kind of impact you want to make. As a result, you concentrate on particular age groups and other aspects that lead to the “viral” status of specific services, goods, films, and news.

First, we must understand the fundamental social media platforms.

Facebook has more than 900 million users, so if you’re already a user, you may not find much new here, but many features here are worth discussing. For example, you may build a dedicated company page and communicate with customers for free by uploading images, products, and videos of the services or goods you hope to sell. By doing so, you can construct a database of people who will forward your postings to their contacts, starting a chain reaction that will never end. Most of these social media platforms offer seamless mobile integration, allowing users to stay connected to media on any device—portable PC, desktop, tablet, or mobile phone—in a way that you should take advantage of.

People access Facebook in various settings, including commuting, at parks, at home, at school, and office. Then you would be there, always playing the mind-trick game to the point where people would discover anything exciting and worthwhile checking according to their interests. You would be pushing your company so that it would appear in the news feeds. It works brilliantly for many large firms, including Starbucks, Microsoft, Apple, Rockstar, Pepsi, and others.

Blogs

When it comes to content quality, blogs are a simple way for people to interact in a semi-professional manner. The key to effective writing, and by extension, good blogging, is always high-quality content. Blogger, WordPress, and arguably the easiest to use one, Tumblr, are just a few of the many blogger CMS (content management services) where you can get yours up and running for free in about 5 minutes. Knowing your market, your audience, who you are targeting, and what you want to achieve with it is one of the tricks in this situation.

This relates to SEO, or search engine optimization, which uses the appropriate keywords to achieve the highest possible ranking in a search engine, such as Google or Bing. It must be relevant to your posts, and you must utilize a keyword search engine to assess the level of competition and the volume of searches for every chosen phrase.

The more convenient it is for you, the lower the competition and the higher the number of monthly searches. To ensure that individuals searching for your service discover you first, you would need to use highly particular keywords if you were to market your website as offering technical help chat. For instance, if it’s something specific—like technical support for Windows—you’ll need to use more direct language.

The most effective way to do this would be to add more keywords that get right to the point because the competition would be fierce, and Windows technical support would have a wide range of content. This would help you rank higher in search engines and make it easier for customers to find your product. For example, you can see how we are narrowing the concept of the service you provide by making it more specific and detailed from “Technical Support Chat” to “Technical Support Chat for Windows 7 and XP.” As a result, the competition for support for mobile operating systems, cellphones, Mac, iPhone, Windows Vista, Windows 8, and similar, are left behind.

Those websites offering the services you’re not related to won’t steal your chances to be found for people who are simply looking for chat support for W. Once you’ve grasped the idea of keywords, you can go on to writing blog posts with information that will be simple to locate on a search engine by using the appropriate tags.

in Tech

What to do once your hit publish on that blog post

After writing a killer blog post, you have an understanding of whatever your audience is going to love and accept. However, how do you know that you have written down something they would adore reading? There is no magical way of informing your audience about it, but SEO Brisbane services will help you.

After hitting the publish button, you immediately need to promote your blog posts. The best news included here is several ways you can get it done. First, the more you are into it, the higher the chances that your blog post is a great read; where you will more likely start getting comments and shares, which more likely help you gain subscribers and readers.

Today, we have shared a few things you should do immediately after hitting the publish blog post button!

  1. Sharing the latest blog posts on Twitter

Simply start with an instant tweet mentioning you have a new blog post by linking to the right URL with a great photograph or even a graphic where your tweet is more likely to get read with the inclusion of the image.

Scheduling a few additional tweets going out in about 3 days, 7 days, since 2 weeks later, even using the scheduler to get this done automatically for you. There are a few additional features for automatically resending the tweets on the schedule of their choice.

  1. Sharing the latest blog post across the Facebook page

You should allow your followers on Facebook to understand that you have a recent blog post, confirming that you contain a bit of blurb with the URL and a picture. Never should you try sharing the latest Facebook posts. Instead, ensure that you should share a nice blend of the old content with the content of other people and general chitchats regarding your life and keeping them social.

  1. Sharing the latest post on Instagram

Always take a better graphic or photo from the posts and share them on Instagram, allowing your Instagram followers to know the latest post present on the blog.

Facebook can ensure that you are taking time across the social platform of Instagram. Never should you share any new posts, sharing snippets from life and ensuring that you are taking time to reply to the good comments on people’s posts.

  1. Start pinning your latest posts on Pinterest

Each time you create the latest blog posts, ensure to start including the images pinnable in the post and taking time where the image is present on each board to be relevant across the group and your boards. You can use the Tailwind app to make these easier and instant while spreading across each pin. Always ensure that you start spending time pinning the people’s content onto the boards, making them appear interesting and attractive to the followers of Pinterest.

  1. Sharing the latest posts with email subscribers

You can get this done each time you post or include them in the weekly newsletter. Do you require any assistance with the email? You should not email the entire blog post to subscribers while they have no reason to click. Instead, the email involves the smaller extract and continued reading of the actual blog post.

  1. Sharing the latest blog posts in the Facebook groups

Several groups on Facebook allow you to start sharing the latest blog posts with a massive audience. Never forget about connecting to the other people in this group. Never become the person dumping the runs and links. You might become very busy that day while you still perform a few likes and prepare a couple of instant comments. It is not the right thing to get done; however, connect with several other bloggers who might offer you all kinds of opportunities across the future, making valuable connections and friends.

  1. Sharing the latest posts on the links of the bloggers

Links allow you to start placing smaller photos and linking to the latest blog posts across someone else’s website. These internal links become the best way to make your site visible and improve the SEO, get several blog comments, and connect with the blogger’s community. When you publish the latest posts, you should start linking them across the best links.

  1. Suggesting the post across the roundups of the industry

There are roundup posts across the blog, including the monthly news about WordPress, mainly popular ones. Make use of the trend to the benefit of reaching out to the blogs hosting these lists and asking about the inclusion of the post. To get this done, you should start locating the sites across your industry by publishing the lists of the roundups. There are a few instant searches on Google where you should start turning up a couple of candidates.

  1. Ensure that you get your blog post SEO optimized

It is surely the thing that should get done earlier on when you hit the publish button for the latest blog posts; however, it will never hurt to get them checked. Ensure that you included the keywords appropriately in the title and scattered them a couple of times throughout the post, first paragraphs, in one of the headings, and in the alt descriptions. If you missed out on this, start updating the post.

  1. Updating the internal links of your earlier posts

The highly innovative thing to get done for SEO is to head back to the older content according to the relevancy of the past content and add the links to the new posts, especially if you wish to start ranking with the newly added and published posts.

The higher you add internal links to the post, the higher the search engines deem this most essential and the higher the ranking. Therefore, keep in mind to start linking from the older articles to the latest ones. However, never add any random internal links, as you should ensure that the posts you are linking to are similar across these topics.

Conclusion

You can make your start by forming high-quality content with the help of SEO Brisbane services. Always ensure that you start working consistently and methodically, and it is almost similar to building casinos in the middle of the desert. If you do not have anyone to inform you about whatever you are planning on doing and the best way you can help them with every effort would never be for anything as you should start taking the blog posts and work them on how to pay off repeatedly.


set up Victony WiFi extender
in Tech

Where should I Put My Victony Extender

Incorrect positioning is one of the reasons why an extender doesn’t work well. No matter how well your Victony extender works, it won’t work well if you don’t put it in the right place. So, when setting up a Victony WiFi extender, you can’t forget about this. Even after the first time you set up Victony WiFi extender   you need to remember where you put it.

We know that most users don’t even realize that bad placement can cause problems for their extenders. So, there are a few important things to remember before you install a Victony extender. Let’s go over each point in the next section to learn how to put an extender correctly. Continue to read.

Where can I put my Victony Extender?

Not in corners

Most of the time, people put their extenders in a corner. Do you know that most WiFi signals disappear in corners? How? Both sides of the corner can be used for WiFi transmission. Wall sides, on the other hand, are a great place for signals to get lost because they are so close together.

So, instead of putting the extender in a corner, you should put it in the middle of your house. So that WiFi signals can reach every part of your home evenly.

Stay away from thick concrete walls

WiFi signals can’t get through concrete or walls that are solid. This makes your internet connection slow and makes it hard to connect to WiFi. If you want to change your device’s WiFi settings, it might be hard to just get to the Victony WiFi extender login page.

The Victony extender should be put somewhere away from solid walls. Place the device right next to a thin door to make sure that signals can easily pass through it. The location may also depend on how much space you need to cover in or near your home.

Avoid surfaces that can reflect

If you have a lot of mirrors, this could make it hard for your Victony extender to work well. To make sure your extender works well, you need to keep it away from surfaces that will cause it to bounce back. If you don’t, your wireless device won’t work the way you want it to.

So, when you set up your Victony extender, you need to get rid of any mirrors or glasses.

Place the extender within the router’s range

While setting up your Victony extender, you should also keep an eye on how far your WiFi router can reach. If your router’s signals only reach the first floor of your home and you want to set up the extender on the second floor, you will get nothing.

Because of this, it is recommended that you set up your Victony extender close to your home router.

Keep an eye on your electronics

We can’t think of a time when we didn’t have electronic devices. We need everything, whether it’s a microwave oven, a fridge, a treadmill, or a Bluetooth speaker. But having all of these devices close to your extender can make it work less well.

In this case, you should keep your extender away from these things while doing the Victony setup  There are a lot of other things, like baby monitors, cell phones, other Wi-Fi-enabled devices, etc., that you should keep away from your Victony extender.

To Sum It Up

All of these things need to be checked when you decide where to put your Victony extender. We hope you’ll remember all of these things when looking for your WiFi device.

The goal of Victony extenders is to make your existing WiFi router work better. But this will only work if your extender is in the right place. So, if you want to take your Internet experience to the next level and stream videos without any lag, you need to put your extender in the right place.

Tell us in the comments how you found the post about where to put a Victony extender. We’re waiting to hear from you!

Belkin extender setup
in Tech

Belkin.range Setup – Everything You Need to Know

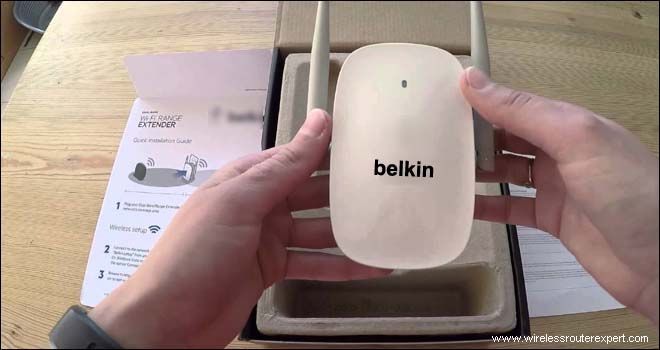
If you’re looking for information on how to set up a Belkin wireless extender, you’ve found the perfect spot. Here, we’ll go through all the options available to you. It’s possible to do Belkin extender setup in one of two ways. The first technique discusses establishing a connection to the extender by pressing the WPS button, while the second technique evaluates the extender’s web-based graphical user interface.

First Approach: Belkin Extender Setup via Web Address

Step 1

Plug your Belkin extender into the wall. Check to see whether your range extender can get power from the outlet. To activate the extender, just press the power button and wait for the lights to stabilize.

Step 2

Connect your router to your Belkin extender’s Ethernet port using an Ethernet wire. Keep a spare Ethernet cable with you. It will help you create the connection in case the former one fails to work for you. However, you also have a choice of using a wireless source.

Step 3

Get your range extender plugged into an electrical outlet and settle down for a while. Check that the wall socket in play is not damaged and is supplying enough power to your range extender.

Step 4

If the power and internet lights on your Belkin extender are both solid green, then you have successfully connected to the internet. When this is done, you may turn on your computer.

Step 5

You may access the Belkin extender’s administration panel from any web browser. But, you have to put the belkin.range web address to use. There’ll be a new window that floats in. When you go to that screen, you’ll have to enter your login and password in the appropriate fields.

Step 6

To complete the setup procedure, please refer to the on-screen instructions on the Belkin.range setup page . How to set up a Belkin extender using a web GUI is complete when you click the “done” button.

Second Approach: Belkin Extender Setup via Web Address

Instructions on how to set up your new Belkin wireless extender are provided below. Make sure you have two Ethernet wires before beginning the configuring procedure.

Step 1

Connect your router to the Belkin extender via Ethernet wire. Connect one end of the Ethernet wire to your router and the other end to the LAN port. Please be patient while the link is being set up.

Step 2

Open a browser of your choice and type the default IP address into the address bar. If you want to access the Belkin Setup dashboard, click the search button.

Step 3

Put the default username into the username area and leave the password field blank to install your WiFi extender without the CD. You may then proceed by pressing the enter key. You should utilize the credentials provided to you by your ISP whenever possible.

Step 4

Then, you’ll be sent to the Belkin extender’s primary configuration page. Access the WAN or DHCP settings panel from the dashboard. Click the DHCP Settings button. Then, check the Yes box next to DHCP. You may now get your IP address i.e. 192.168.206.1 in an instant using this method. Afterward, edit the address and save the changes. It’s a good time to the make your way to the homepage.

Step 5

If you’re looking for advice on which encryption method to use, WPA2 is your best bet. The password prompt will then appear. To apply the new configuration, give your device a fresh start.

Endnote

If you’re having trouble setting up your Belkin extender using the IP and web address, we’re certain that the advice we just gave you will help. It is advisable that you follow the correct instructions as mentioned above. But, never ignore firmware updates on your extender as they are one of the best ways to streamline your extender’s performance.

how-to-animate-a-custom-logo
in Tech

How To Animate A Custom Logo With An Easy-To-Follow Guide

Hey there, logo animators! 

I’m here to tell you how to easily animate your own logo with a custom-made animation sequence. However, if you are not a designer, then getting a professional-looking logo is quite difficult. So, it will be great to have a logo designed by the right animation company. But if there is no option left and need an urgent designer. In such a case, you can design your own logo. In this article, you’ll learn how to gather your assets, convert and trim them in Photoshop, create an easy-to-follow composition timeline, and lower MP4 files into the composition so that they can play back smoothly. 

Choose Your Tools

Now that you know what you need to create a logo, it’s time to choose the right software. So, the first step is choosing your animation software:

  • Adobe After Effects (the best)
  • Adobe Illustrator (if you’re really into creating vector graphics)
  • Adobe Photoshop (for those who prefer a more traditional approach)

Adobe Premiere Pro can also be used for animation, but it’s not as powerful as the other two options listed above. If you’ve got an older version of Windows or Mac OS X and don’t mind spending some money on extra features like GPU acceleration and dynamic link libraries (DLLs), Motion 5 is another option worth considering.

Gather Your Assets

  • Import your logo
  • Transfer audio
  • Import your video

Convert And Trim Your Assets

Before you can start animating your logo, you’ll need to convert and trim your assets.

  • Import the files from your design software into Adobe AfterEffects. You can do this by using the “Import” command in the File menu and choosing Import Files from Finder or Finder via Copy/Paste (depending on which version of OS X you’re using).
  • Use the trim tool to cut off any excess parts of each file that are not needed for animation purposes; this will make it easier for us later on when we’re working with them in our timeline!
  • Go back into After Effects’ library panel by clicking Library > Browse Files and Folders… at the top left corner of your screen (or press Command + R). Navigate through until inside the “3D_Assets” folder located under the “Documents” folder, where most likely there will be another folder named “Logo. Open up this new folder and find all three logo files inside it; copy them over into some other location, such as the desktop, so that no one accidentally loses them again during switching between workflows, etcetera.

Create A Master Composition

Now that you’ve created your custom logo animation, it’s time to add some final touches.

  • Include a mask in your work.
  • Change the duration of your animation

Add Text To The Layers Panel

  • Add Text to the Layers Panel
  • Create a Text Layer
  • Set the text font and size.
  • Change the color of the text
  • Set the opacity of the text in the Layers Panel (optional).

Build The Logo Animation Sequence

  • Importing Assets
  • Adding The Logo To The Timeline
  • Setting the Duration of Each Layer
  • Adjust The Starting and Ending Points of Each Layer (Optional)
  • Make The Key Frames For Each Layer

Compress The MP4 Files Into The Composition

  • Import the MP4 files into your composition.
  • Lower their opacity to 0 so that it’s easier to see what’s going on in your animation sequence and make adjustments as needed (i.e., adjusting layer duration).

Make The First Layer Visible And Set The Duration

Make the first layer visible and set the duration of each layer in the timeline. When you’ve created the first layer of your custom logo animation, it’s time to set its duration. You can do this in two ways:

  • Open up the Time Ruler on your Timeline and go to the bottom of its menu. There, choose “Duration.”
  • On a Mac, hold down Option (PC) or Alt (CTRL) while clicking on one of your layers and select “Duration.”

Animate The Logo Yourself

You can animate your own logo. It’s not hard, and you don’t need a lot of expensive software. Moreover, the good news is that you don’t even have to start from scratch! Adobe After Effects has an animated logo feature that allows users to add text and movement to their logos without having to create the animation themselves (which would be time-consuming). This can be used as a starting point for your custom animations.

If you’re using Adobe Illustrator or Photoshop, there are also some great tools available in these programs that will allow you to make changes and add effects quickly—and at no cost! You’ll need an account on either SoHo Illustrator or Adobe Stock if these services aren’t free yet, but once they are, well, then go ahead and explore them!

Conclusion

By following these steps and using the tools we’ve outlined, you can create your own logo animation sequence. We hope this article has shown you how easy it is to animate a custom logo. If you have any questions or need further assistance, please leave a comment below or get in touch with us on Twitter or Facebook!

Close